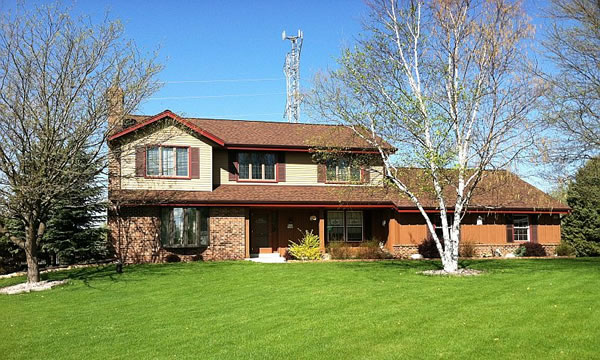
Milwaukee and Waukesha Roofing Process

Each Waukesha and Milwaukee roof needs to be completed a little differently but for the most part, we are able to follow the same basic system for each Milwaukee roofing installation.
Our Roofing Process
Our first step is securing all necessary permits needed for the construction process. We sure don’t want to be in the middle of your roofing job and get shut down for not pulling a permit!
The first thing we do when arrive at your home in the morning is to lay tarps on the ground and lay plywood against the house. While we know a properly installed roof is very important to you, we also know you don’t want to find any damage to your flowers or home!
Once we have the property properly protected, we start the tear off on the roofing project. During this time please be aware that there is a lot of noise and controlled mess that is created. Remember, we are removing thousands of pounds worth of materials and creating a lot of vibrations on the walls so we highly recommend you remove all valuables off of your walls.
Unlike other roofing companies who just use aluminum to cover up the old holes in the roof created from the box vents, we use a product called the EZ plug to properly cover previous box vent holes. Not only does this give us a solid material to nail into, it is much safer for anyone who ever walk on the roof after we completed. No more worrying about stepping on the former hole and falling into your roof!
If you have an older home where there is spaced sheathing or where cedar shingles used to be installed, there will be spaces between each wood plank. This was done originally because cedar needed to be able to “breathe” and the spacing allowed this to happen. However, nowadays with asphalt shingles, they need to be installed on a solid surface. Installing them over spaced sheathing will create an improper installation due to the fact that there will be areas where the shingle nail line is placed between the planks. This is why a re-sheathing of the roof will often be necessary.
Before the ice & water shield is installed on your roofing job in Waukesha, new 2×4-inch, baked enamel aluminum edge will be installed on all of the roof perimeters, if it is not already present or if new gutters are being installed. The color will closely match the color of the new shingles. The metal edge will enhance the architectural appeal of the shingles and will protect the fascia boards from dry-rot and premature deterioration. The bottom ¼ inch of the metal edge will be bent out at a 45-degree angle to prevent continuous wetting of the fascia boards from night moisture, fog, melting snow, etc.
Asphalt shingles work on the principle of shedding water from one row of shingles to the next. However, not all water runs downhill on the roof. Heavy winds will sometimes drive rain up under the shingles. Fog and night moisture can also find its way between the shingles. There is also the potential damage that can be created from ice dams. For this reason, a waterproofing membrane underlayment is required to prevent wind-driven rain and water vapor from penetrating the roof surface. We install ice & water shield to equal two feet inside the “warm-wall” of your house. Ice dams form along the eaves when snow melts on the roof and then re-freezes along the eaves. Ice dams cause water from melting snow to back up under the shingles and leak into the attic and the exterior walls. Quite often, roof leaks caused by ice dams will not show up on the surface of interior walls and ceilings. Instead, the melted ice will run down inside the walls.
To prevent leaks caused by ice dams, a heavy waterproof membrane will be installed along the lower 3 / 6 feet of the roof perimeter, along the lower ends of the skylights, and in the roof valleys. Ice & Water Shield is a self-adhered protective membrane that sits between the shingles and the plywood sub-roof. Ice & Water Shield is made of a rubberized asphalt adhesive backed by high-density cross-laminate polyethylene. The Ice & Water Shield will seal out water from melting snow and prevent possible leaks into the interior walls and ceilings. Ice & Water shield is also applied in valleys, around chimneys and all other roof protrusions.
After the ice and water shield is installed, we then install either the standard asphalt underlayment or a high performance synthetic underlayment. The benefits of a high performance synthetic underlayment are that they offer long term moisture protection for your roof compared to standard felt, acts as an non-absorbent, secondary water shedding barrier and reduces the chance for tears that cause leaks due to unique bottom surface coating compared to felt underlayment.
Now here comes the installation of the starter strip shingles that are installed around the perimeter of your home. Starter strip shingles protect your roof by filling in spaces under the edges and helps keep water from getting through to the deck between any gaps in the first course of shingles. Starter shingles also ensure an even application and when properly positioned, the adhesive will lock your shingles in place to prevent blows along the edges of your roof.
At this point we install new W-Style Aluminum valley metal. New 18-inch, galvanized, 26-gauge sheet metal roof valleys will be installed in the valley areas. The shingles will extend into the sheet metal valleys approximately 7 inches and will be trimmed to match the angle of the metal valleys. The top corners of the shingles overlapping the valleys will be clipped at a 45-degree angle to prevent rainwater from catching the corners of the shingles and being diverted horizontally across the top edges of the shingles. Unclipped corners of shingles tend to divert rainwater sideways under the shingles – sometimes as far as 10 or 15 feet, which results in leaks into the interior.
It is finally time to install the shingles. All shingles are installed according to manufacturer specifications so you get a roof with a valid warranty. While shingling the roof, there are various obstacles on the roof such as pipe flashings and exhaust vents. We install new polyethylene storm collars on all plumbing vent pipes. The new storm collars will maintain a perfect seal at each plumbing vent pipe and will last indefinitely. The cast iron plumbing vent pipes extend above the roofline through pipe flashings. The majority of Waukesha roofing companies don’t use lead around these cast iron pipes. They must be flashed with new lead due to chemical reactions that occur between polyethylene flashings and cast iron. Failure to install lead flashings around cast iron will result in premature failing in this area. All bathroom and kitchen exhaust vents are installed with properly baffled exhaust vents.
Now comes time to properly flash the chimney. This is one of the most problem prone areas on a roof as many unskilled roofers are not able to properly complete this task. If Necessary, a new cricket flashing will be installed at the upper side of the chimney and will extend beyond both sides of the chimney and then get wrapped towards the front. Along the sides of the chimney, new 8×10-inch sheet metal step flashings will be installed at each row of shingles connecting to the chimney.
The new step flashings are L-shaped sections of sheet metal that will extend 2 ½ inches under the new shingles and 2 ½ inches up the side walls. The new sheet metal step flashings will make a watertight connection between the shingles and the sides of the chimney. The new step flashings will extend two inches past the lower corners of the chimney. The two-inch extensions will prevent rainwater from leaking into the skylights at the lower corners. Along the lower side of the chimney, a new sheet metal apron flashing will be fastened to the chimney and will extend 4 inches over the shingles directly below. The new sheet metal flashings will direct rainwater around the chimney, making it watertight for the life of the roof.
From this point, we install the ridgevent. Proper attic ventilation is required to create the airflow necessary to remove water vapor from the attic. Without adequate ventilation, the warm moist air, migrating into the attic from inside the home, cools and condenses into water droplets. The condensed moisture soaks into the attic insulation and wood framing – and can cause mold, mildew, and rot.
Good attic ventilation provides:
Less chance of moisture condensation in the attic , Prevention of toxic mold in attic, ceilings, and walls, Reduced possibility of ice damming, Cooler attic temperatures in the hot summer months, Less demand on air conditioning equipment, Significant savings on energy costs.
To provide an opening for airflow at the top of the attic, 1.25 inches of plywood will be removed along both sides of the ridgeline. The new opening will extend along the entire ridge and terminate 18 inches from each exterior wall. The removal of the plywood will provide a continuous opening along the ridge, which will allow attic air to escape to the outside. The new ridge vent system will be installed along the entire ridge. As attic air exits through the new ridge vents, outside air will be drawn into the attic through the soffit vents, which are located under the eaves.
Note: As recommended by ridge vent manufacturers, the existing roof and gable vents will be closed off to prevent them from interfering with the chimney-effect provided by the new ridge vent system.
Finally we install the PROPER ridge cap shingles. Ridge cap shingles will be installed over the ridge vent to retain the visual continuity of the new shingle roof. These shingles are specifically designed to go with your roofing system and will last the lifetime of the shingles themselves. We will not cut up 3-tab shingles into ridge cap to install on your roof. These 3-tab shingles are designed to last a maximum of 30 years. The ridge & hip is one of the most vulnerable points on your roof due to the shingle having to spend its life cycle bent. If 3-tab shingles were to be installed, the ridge shingles would have to be done twice during the same lifespan as the original roofing system. The ridgecap shingles will match the roof in color.
Clean up the is the most important part of the Waukesha roofing process. During the project, your yard will receive a thorough cleaning at the end of each day including all nails being swept by a magnet and debris in the dumpster.
Finally, the roofing project is completed and we do our final walk through and inspection. From this point on, with our extended warranties, you will never have to worry about roofing your home again!
Contact us now to schedule your appointment.